
Finding New Artistic Materials: The Allure of Art Clay Silver
As an artist I am always looking for new materials to work and express myself with. One of my favorite materials to work with is metal, however I do not have the space currently to do the type of metal work that I would like to. That’s where alternative materials come in! Art Clay Silver is a versatile material for creating handmade jewelry and unique art. In this post I will be talking about Art Clay Silver, its benefits, cons, and I’ll include a little about my recent attempts at working with this new to me material.
What is Art Clay Silver?
Art Clay Silver, despite its name, is not an actual clay. It is a clay-like substance made up of organic binders and small particles of real silver. Unlike traditional earth clays or even polymer based clays, both of which I have used, art clay silver can dry out very quickly and can be tricky to shape due to how sticky it can become when not mixed properly.
What I enjoy the most about working with art clay silver is that it allows the creation of art and handmade jewelry from metal more accessible to artists like myself. Condo living is not the best for working with molten metal. But with art clay silver, creating sculptures and jewelry with 99% pure silver in my own studio WITHOUT needing a large amount of equipment is way more affordable and safer.
The Process
Sculpting
Working with art clay silver is fairly simple, but still requires a certain amount of skill. I found that the easiest way to sculpt this material is with silicone tools, much like the tools you would use for polymer clay. I would recommend staying away from wooden clay tools, as the clay will dry to the tools and be impossible to scrape off. But with silicone I found it super easy to clean the excess off and save it for rehydrating later.
While making my second ring, I wanted to include a small butterfly on it, rather than fully sculpt this, I used a silicone mold I had previously purchased for UV resin and molded it! It is important to note that the clay will need to be fully dried before it can be removed from the mold. This can be achieved by letting it air dry for 24 hours, or by using a hair dryer. Once it was dry I removed the butterfly from the mold and attached it to the band using some paste I had made by mixing a little more water into the clay and spreading it on with my silicone tools (I have these from Amazon).

Another thing that will be helpful if you are making rings is a ring mandrel or ring sizer, along with masking tape to make removal from the mandrel easier. One thing to note is that you will want to be sure that you refer to the manufacturers sizing guide, as it will shrink when fired! I purchased this 20 grams package from Amazon in June 2023 for about $45 (at the time, it appears it has gone up in price since then and is currently $53 as of August 2024), in the package there is a pamphlet with firing info, shrinkage rates, and more helpful info for getting started. You can also find more info at the manufacturers website here. I will also link some of my favorite videos below that I binged while preparing to make my first piece.
As a side note, you may be wondering how far 20 grams will get you, well so far I have been able to make two rings, and one pendant and I still have about half the package left!
Firing
Like I said earlier, this material is made up of organic binders and small particles of silver. When heated the organic binders burn off, while the silver particles heat up and meld together. Firing the piece is fairly easy as well. While the best way to fire art clay silver is with a kiln, you do not need one! In fact I use a torch and follow the manufacturer’s directions in regards to distance from the piece, timing, and how to tell if you are heating the piece enough or too much.
It is recommended that you use some fire proof brick to rest your piece on. This will allow it to heat evenly and prevent anything from being burned that shouldn’t be.
Finishing
Once the organic binder has been burnt off and the piece has cooled down, you will be left with a piece of pure solid silver that will be coated in a white cast. This can easily be cleaned off with a wire or acrylic brush. Once cleaned off you can proceed with shining, and adding a patina to your new piece. The most common way to add patina is by using liver of sulfur; which yes smells terrible, but it creates a beautiful effect! I would highly recommend doing this part outside and away from other humans and pets. They will thank you later.
My experience and plans for the future
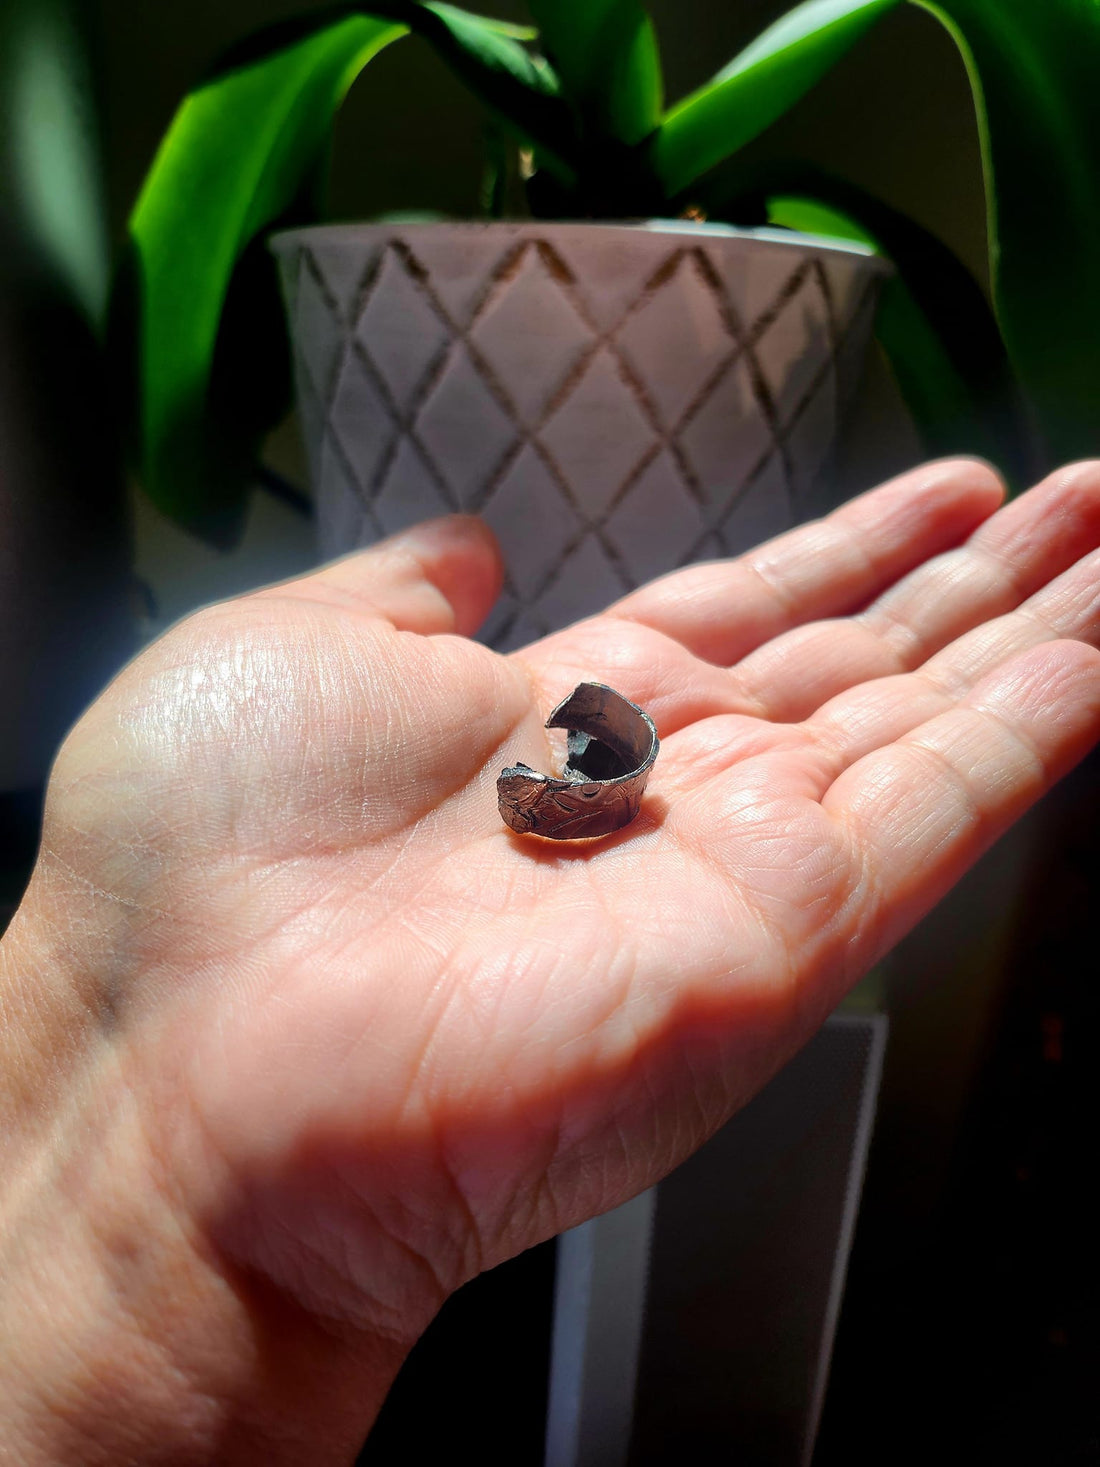
For me part of being an artist is finding new materials, obtaining the materials, and watching literal HOURS of people working with the material before I even make my first piece with it. I had spent months wanting Silver Clay and being excited to finally use it. I spent two days sculpting, drying, firing, putting patina on, and polishing my 2nd ring made with silver clay. Less than 24 hours later it was broken! I was upset, and going over everything in my head that I could have done better. But, that's all part of the (sometimes frustrating) learning experience.

In the past year I have realized that I am a bit of a perfectionist when it comes to art; and failing to make the “perfect” piece can really be frustrating for me. However I am beginning to accept my failures more easily and treat them instead as the learning experiences they are and not allowing them to impede in my creativity the way it has in the past.
I do intend to try my hand at creating with this material again, so keep an eye on my socials for updates on my most recent works! You can also sign up for my email list to get notified when I add new things to my shop or post new blog posts like this one!
Want to see some of the videos I watched? Check out the links below!
See ya later gremlins!
Reference Videos:
How To Torch Fire Silver Clay by Cooksongold